Wednesday, June 3, 2015

Pulled Pork


Served here on grilled whole-grain crusty rolls.

I got this recipe from my friend Lynne, 
who uses it to make the most succulent, tender brisket I've ever tasted. 
I substituted a pork loin for the brisket, and was initially a little dismayed when the pork shredded apart, rather than slicing up nicely the way the brisket had. 
But then I realized I had actually made pulled pork. Most delicious accident ever.

 
Ingredients
==========================================
  • pork loin (~four pounds)
  • barbecue sauce (one bottle)
  • dried onion soup mix (one packet)
  • beer, root beer, or cola (one can)
  • buns (optional)
  • tin foil


Instructions
==========================================
  • Preheat oven to 250F.
  • Place a very long piece of tin foil (about 3x as long as your piece of meat) in a 9x13 pan.
  • Position the pork loin in the centre. Make sure there is enough foil on all sides to hold liquid.

  • Empty the bottle of barbecue sauce over the meat. 
  • Sprinkle the packet of onion soup mix on top of the sauce.
  • Slowly pour the can of beer into a corner of the foil, so that it surrounds the meat but doesn't wash off the sauce on top.
A delicious meat-island with a nice foamy moat.
  • Carefully fold the long edges of the tin foil over, tenting it so that the foil does not touch the top of the meat.
  • Fold and press all the edges to create a nice tight seal.
  • The goal is to prevent any liquid or steam from escaping.
  • Put in the oven carefully. Remember there is a can liquid inside your foil tent, so try not to slosh it about too much.
Do NOT open the foil no matter how absolutely mouth-wateringly good it smells.
  • Bake at 250F for at least four hours. It can cook for another couple hours if need be, but will be ready to eat after four.

Be Patient

  • After four hours, remove from oven and let the meat rest for 10-15 minutes.  Do not open the foil yet.
  • While the meat is still hot, take a couple of forks and shred it.  The pork should flake apart easily.
Be gentle here -- you don't want to dig too deep and shred tin foil into your pork.
  • Mix all the sauce in with the shredded pork.  It will seem too juicy at first, but the more you stir it in, the more it seems to be just right.
So saucy.
Serve and enjoy!

Saturday, March 8, 2014

Roasted Chicken and Grapes

I discovered this recipe online while searching for a way to use up fresh grapes that had become a little too wrinkled to eat.  The original recipe calls for things I didn't have at hand, so I made a few substitutions and it was still absolutely delicious.  This is a very quick and easy recipe, and smells incredibly good while cooking.

Ingredients for Roasted Chicken and Grapes
==========================================
For the grapes:  
  • 1/2 lb grapes red, green, or a mix; can be wrinkly
  • 1 tsp olive oil
  • Pinch of salt 
For the chicken:
  • 4-6 chicken thighs boneless, skinless
  • 1 tsp garlic powder or can use minced
  • 1/2 tsp rosemary or can use fresh sprig
  • 1/2 tsp salt
  • 1/4 tsp pepper
  • 1 TBSP olive oil
  • 1 TBSP wine (red or white)
For the pan sauce:
  • 1 TBSP onion minced
  • 1/4 cup wine white or red
  • 1/4 cup chicken stock
  • 1 TBSP butter unsalted, cut into 4 small cubes.  Hard margarine is also okay.
  • 2 TBSP fresh minced parsley(optional)
  • Salt
  • Lemon juice  
 
Prepare the Grapes and Chicken
==============================
  • Preheat oven to 450F.
  • Rinse grapes and remove stems.
  • Place in a large ovenproof skillet and toss with olive oil (1/2 tsp) and salt (pinch).
  • In a medium bowl, mix together garlic powder (1 tsp), rosemary (1/2 tsp), salt (1/2 tsp), pepper (1/4 tsp), olive oil (1 TBSP), and wine (1 TBSP).
  • Add the chicken and use your hands to rub the mixture in gently but thoroughly.
  • Nestle the chicken in the pan with the grapes, smooth-side up.
  • Bake at 450F for 30 minutes before moving on to the next step.

Prepare the Sauce
=================
  • Transfer the cooked chicken and 2/3 of the grapes to a serving dish and keep warm.
  • Put the skillet with the remaining juices and grapes on the stove on medium-high.
  • Add minced onion (1 TBSP) and wine (1/4 cup).
  • Cook until wine has reduced, stirring and scraping the bottom of the skillet until the onion is soft and the pan is clean.
  • Reduce heat to medium and add chicken stock (1/4 cup) and boil gently to reduce until sauce is nicely thickened.
  • Remove from heat and add butter (1 TBSP) one small cube at a time, stirring between each addition.
  • Taste and add a dash of salt; taste and add a dash of lemon juice; taste again and decide to add more salt or lemon juice based on your own preference.
  • Stir in minced fresh parsley (if using).
  • Spoon sauce over chicken and enjoy!
Original Recipe Link: http://food52.com/recipes/19299-simple-roasted-grape-chicken

Wednesday, January 1, 2014

Umani -- "Delicious Boil" -- Japanese New Year's Day Feast

 Pictured: tori niku (chicken meat, top centre); uzaru (quail) eggs (top right); shiitake mushrooms (right); renkon (lotus root, bottom centre); konnyaku (yam alimentary paste) ribbons (top left); and satoimo potatoes (middle).

This delicious dish, traditional New Year's Day fare, is made by cooking several items separately and combining them at the end. 

Although each item requires preparation, the cooking is actually quite easy if the prep work is done in advance (preferably leisurely throughout the day).

The completed umani is a slightly sweet ginger dish, with each item in it bringing its own delightful flavour and texture.  

Ingredients
10 satoimo potatoes
1 lb chicken thigh meat ("tori niku")
6 small shiitake mushrooms, dehydrated
1 package fresh quail eggs ("uzaru")
1 block yam alimentary paste ("konnyaku")
1 package lotus root ("renkon")
1 bottle sweet cooking sake ("mirin")
1 bottle soy sauce ("shoyu")
Bonito Fish Stock ("hondashi")
Fresh Ginger
Sugar 
Pictured: Ingredients for Umani, Namasu, and Soba


First, get the mushrooms rehydrating:
 Put dehydrated mushrooms in a large bowl and fill with water.  Flip mushrooms throughout the day to get them nice and succulent.  The water will turn a little brown -- this is good.  This "mushroom juice" is used in the umani.  I did the whole pack (above) to have extras for the soba and cooking the next day, but only 6-7 are used in this recipe.  Once rehydrated, discard the mushroom stalk and slice the caps into strips.  Set aside.

Prepare the konnyaku ribbons:
Slice the konnyaku into thin rectangles.  Then cut a slit down the middle of each, being careful not to cut through either end.  Carefully push one end through the centre slit, forming the ribbon.  Blanch in boiling water for 5 minutes, drain, and set aside.

Peel the hairy potatoes (satoimo).  Blanch in boiling water for 5 minutes, drain, and set aside.

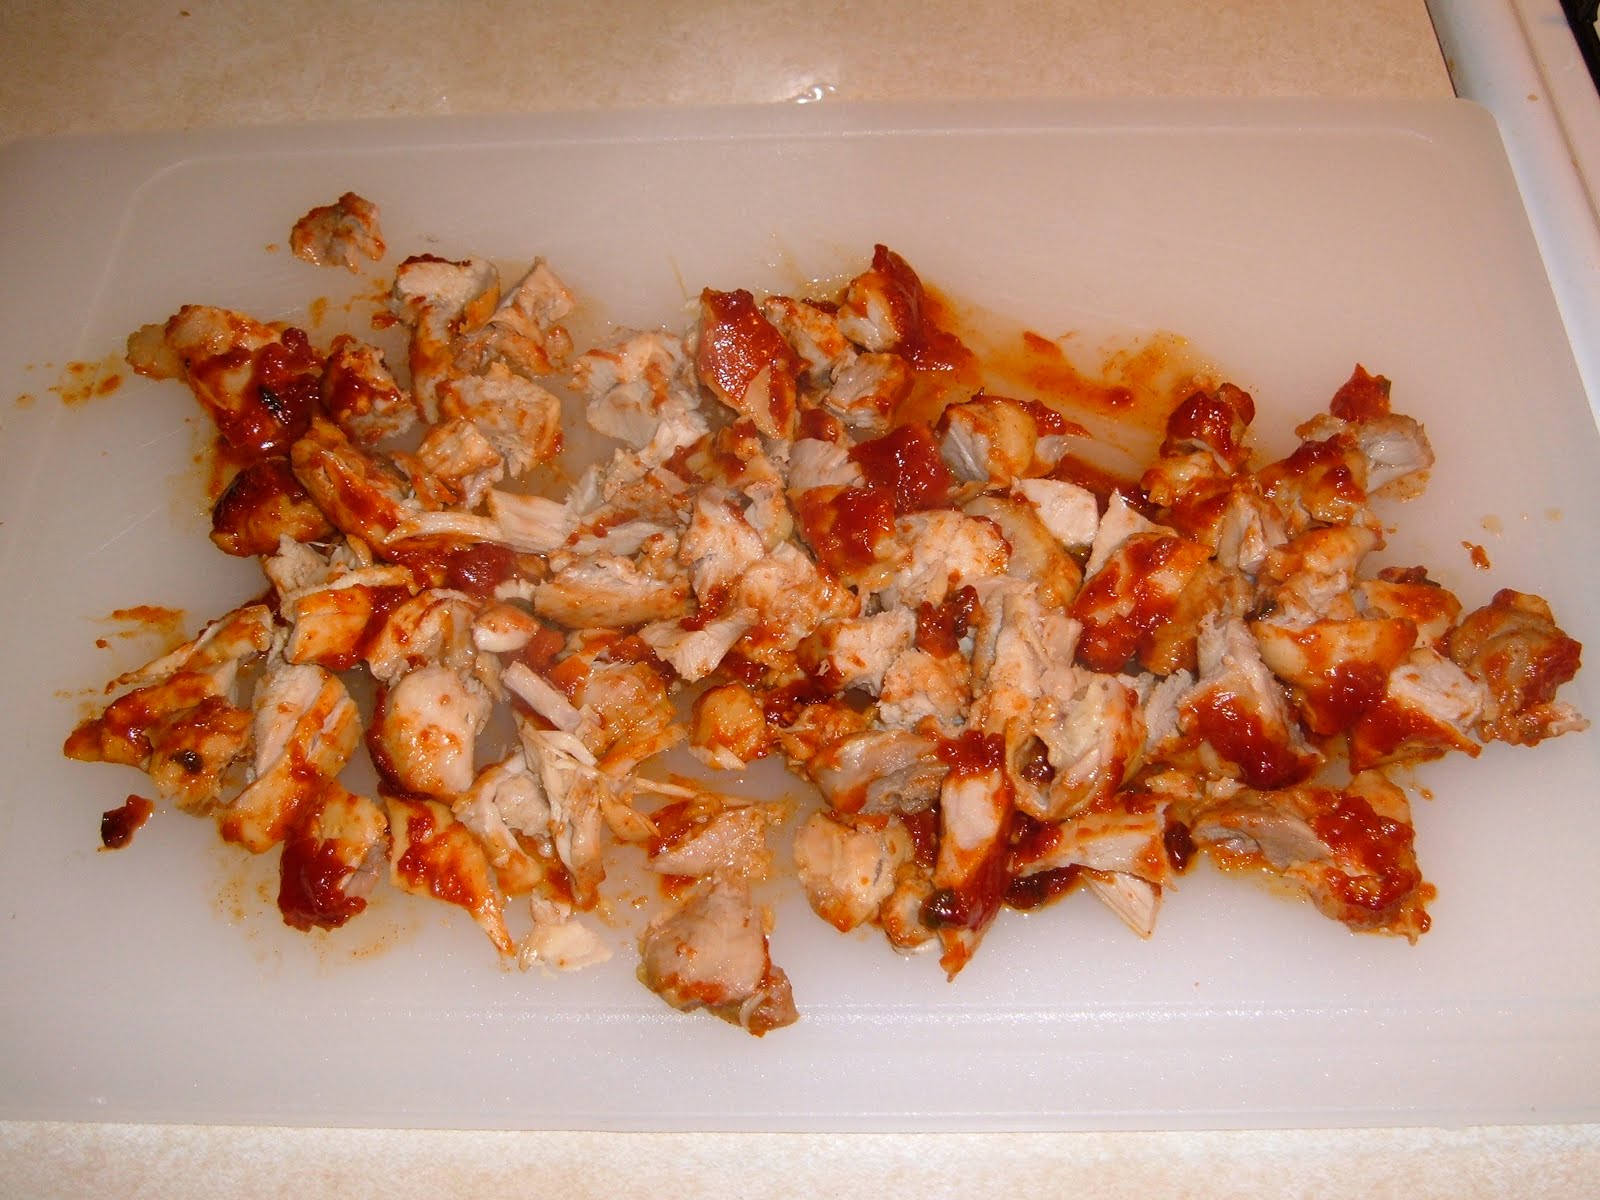
Cut the chicken into bite-sized pieces and set aside.

Place the quail (uzaru) eggs into boiling water and boil for 5 minutes.  Plunge into cold water and gently peel.  Rinse, drain, and set aside.

Open package of lotus root (renkon); rinse, drain, and set aside.

Boil 1 cup of water and add 1/2 tsp of hondashi stock.  Set aside.

Your prepped ingredients should look like this:
Quail eggs, bottom left; satoimo potatoes, top left; shiitake mushrooms, top right; lotus root, right; konnyaku ribbons, middle.


To expedite the process of cooking, have three pots on the go at the same time: one large and two medium.


* In medium pot #1, bring 2 cups water to a boil and then add:
  1 tsp hondashi soup stock
  1 tsp soy sauce
  1 TBSP sugar
  1 TBSP mirin
* Add the peeled quail eggs and boil until flavours are absorbed, about 8 minutes.
* Scoop out eggs when done and set aside.

* In the large pot, stir together:
  1 tsp fresh grated ginger
  2 TBSP mirin (sweet cooking sake)
  3 TBSP sugar
  3 TBSP soy sauce
* Add the chicken and boil, covered, in sauce until cooked, about 10-15 minutes.
* Scoop chicken out when done and set aside.

* In medium pot #2, stir together:
  5 TBSP mushroom juice
  2 TBSP sugar
  1 TBSP mirin (sweet cooking sake)
  1 tsp soy sauce
* Add the shiitake mushrooms and boil in sauce until cooked, about 10 minutes.
* Turn down to low and cook for another 5-10 minutes.
* If mushrooms are large, double the amount of sauce, above.
* Pour sauce out with mushrooms when done and set aside.

* Once the quail eggs are removed from medium pot #1, add the following to the juice left behind:
  1 tsp sugar
  1 tsp soy sauce
* Add the konnyaku ribbons and boil in the juice until soft, about 15 minutes.
* When done, scoop out and set aside.

* Once the chicken is removed from the large pot, add the satoimo potatoes to the remaining juice and boil until cooked, about 15-20 minutes.
* Add more base sauce while the potatoes cook:
  3 TBSP sugar
  3 TBSP soy sauce
  2 TBSP sugar
  1 tsp grated ginger
* When done, pour sauce out with potatoes (it will be caramelized) and set aside.

* Once the konnyaku ribbons are removed from medium pot #1, add the following to the juice left behind:
  2 TBSP mushroom juice
  1 TBSP soy sauce
  1 TBSP sugar
  1 TBSP mirin (sweet cooking sake)
  1/2 cup hondashi stock to cover
* Add lotus root (renkon) to sauce and boil until tender-crunchy, about 10-15 minutes.

At this point you should have all the ingredients cooked.  Put them all into one bowl, and mix it up.
Every bite of this is pure delight.
This dish can be served hot, or made the night before and served cold on New Year's Day.  Waiting a day makes the flavours really absorb into the food -- the mushrooms in particular are like eating luscious jewels.

Serve with rice and namasu (jellyfish salad)
If only it could be New Year's Day every year.  Mmmm!


I made more the next day using regular potatoes instead of satoimo (they were good, but the satoimo are much better).  I also added julienne carrots cooked in the same mirin/soy sauce/sugar base, and poached a couple of regular eggs in the leftover sauce from the quail/konnyaku/renkon pot.  
 
The white in the middle is poached egg.  Mmmmmmmm.

 Thank you so much to my mother-in-law for teaching me how to make this excellent food :)

Happy New Year!


Tuesday, December 3, 2013

Jennifer J's Taco Bake


Taco Bake is one of our all-time favourite recipes.  It started out as an optional recipe off of a soft taco kit box, but when that recipe stopped appearing, we had to re-create it and have since refined our approach.  A good reliable recipe for a chilly day.


Ingredients for Taco Bake
===========================
  • Salsa (1 cup for normal, 2 cups for juicier Taco Bake) 
  • 1 can cheddar cheese soup (I like Fiesta for extra kick) 
  • Cherry tomatoes, pack full of flavour but wrinkly (could substitute or add can of kidney beans here)
  • Laughing Cow, 2 pieces (optional -- adds creaminess) 
  • Taco powder packet (can use 2 Tbsp chili powder, 1/4 tsp cayenne powder, 1/4 tsp garlic powder instead) 
  • 4 tortillas 8-10" depending on size of casserole dish (whole wheat tortillas are good in this recipe) 
  • 1 lb ground meat such as turkey or hamburger (not shown) 
  • Ground cheese 1 cup for normal, 2 for super cheesy, habanero or cheddar recommended (also not shown)


Prepare the Ingredients
=========================
  • Heat oven to 350 
  • Top tomatoes, slice in half, and season to taste with salt and pepper
  • Open can of soup 
  • Measure out chili, cayenne, and garlic powders (or open taco spice packet) 
  • Open and unwrap the Laughing Cow 
  • Trim the edges of tortillas if too large for casserole dish 
  • Have a spatula ready


Cook the Ingredients
======================
  • Scramble-fry ground meat and drain off any fat or liquid 
  • Add soup, Laughing Cow, and spices 
  • Mix and stir until it bubbles and makes a thick meaty sauce, about 3-5 minutes


Assemble the Ingredients
==========================
  • Grease your dish (Pam is fine) and wipe off excess 
  • Then layer the following (there are 4 layers in total):
  • 1 tortilla 
  • 1/4 meat sauce
  • 1/4 chopped tomatoes
  • 1/4 salsa 
  • 1/4 cheese 
  • Smooth each layer down so it forms a nice clean Taco Bake
 
Bake at 350F for 45 minutes to an hour, and serve with hot sauce or a dollop of sour cream.


Enjoy!  

Friday, August 2, 2013

The Best Cake in the History of Cake

Pineapple-Lemon Variety, Auntie Bonnie Style

This extremely versatile cake can be made in a variety of ways depending on how simple (or how fancy) you want to get and what flavours you'd like to use.  It is always moist, dense, delicious, and very, very easy.


Ingredients for Basic Best Cake Recipe
======================================
 Cake                  Frosting                    Optional
 * cake mix            * milk (3/4 c)              * fruit, nuts, 
 * pudding mix         * Light Cool Whip (tub)       chocolate, candy,
 * water (1+3/4 c)     * sugar-free pudding mix      etc.
 * eggs (3 whites)
   
Easy 12-Step Basic Best Cake Method
===================================
 1. In a large glass mixing bowl, combine the cake mix and the
    pudding mix.
 2. Separate three eggs (the yolks are not used).
 3. Slightly beat the whites with a fork.
 4. Add the beaten egg whites and the 1+3/4c water.
 5. Beat on medium-high for about one minute.
 6. Pour batter into two 8" round pans which have been sprayed with 
    cooking spray and have a circle of waxed paper on the bottom.
 7. Cook according to directions on the cake box (usually 350F for 
    about 25 minutes).
 8. Cool the cakes for ten minutes on wire racks; turn out and cool 
    completely on racks (about one hour).
 9. In a second mixing bowl, combine milk (3/4 c) and sugar-free 
    pudding mix.
10. Beat on medium-high for two minutes.
11. Add Cool Whip and beat until fluffy and well-combined, 
    about 1 minute.  Fold in desired fruit, candy, flavouring, etc. 
    at this point.
12. Frost and decorate the cakes.


Enjoy.

By combining different cake mix/pudding flavours, pairing interesting cake/frosting combos, trying different pan sizes, and incorporating elements such as fruit, candy, nuts or chocolate, it's easy to make a wide assortment of simple, fast, delicious cakes which are moist, dense, and absolutely do not taste like they came out of a box.
   

This cake pictured above is my Auntie Bonnie's Pineapple-Lemon Cake recipe, where it all began.  To make it, follow the basic recipe and substitute as follows:

Pineapple-Lemon Cake
====================
 Cake                  Frosting                     Optional  
 * Yellow Cake mix     * milk (3/4 c)               * one can crushed
 * Lemon pudding mix   * Light Cool Whip (tub)        pineapple, VERY 
 * water (1+3/4 c)     * Vanilla sugar-free pudding   well-drained 
 * eggs  (3 whites)

   Fold the crushed pineapple gently into the whipped pudding 
   mixture, at the end of Step 11, above.  This also works
   extremely well with (thawed) frozen strawberries.
====================


This cake is so good that I made eleven different variations of this style (8" round double-decker) and served them at my wedding:
Just chop up whatever treat you like, mix it in with some of the frosting, and slather it nice and thick between the cake layers.  You can also add 1/2 tsp artificial flavouring to the frosting, if desired.

They ended up looking like this:
 

I've used this cake as a fancy dinner party dessert (above), as the basis for a robot birthday cake and a computer birthday cake, a fourth-of-July cake, and a couple of rather decadent chocolate-chip-cookie cakes.  

It is always reliably excellent.


Sunday, December 26, 2010

Stained Glass Sugar Cookies

This recipe is from a website (given at bottom) for heart-healthy, low-cholesterol cookies. The "stained glass" effect is made from melted crushed candy canes, and is both pretty and yummy.

Ingredients:
Cookies:
2-3/4 c flour
1 tsp baking powder
1/2 tsp baking soda
1/2 tsp nutmeg
1/4 tsp salt
1/3 c butter
1 c sugar
1/3 c canola oil
1 egg
1 tsp vanilla
1/2 tsp lemon zest (grated lemon peel)
1/3 c buttermilk
1 box candy canes

Frosting:
1 egg white
1-3/4 c icing sugar
1 tsp water
food colouring
sprinkles

How to Make:

Preheat oven to 375.

In a medium bowl, combine flour, baking powder, baking soda, nutmeg, and salt. Set aside.

In a different, larger bowl, whip butter with an electric mixer on medium to high speed (about 30 seconds). Add sugar. Beat until fluffy, scraping the side of the bowl occasionally. Beat in oil, egg, vanilla, and lemon zest.

Alternately add flour mixture and buttermilk, about 1/3 at a time. Beat on low after each addition until combined. Divide dough into quarters. Cover and chill for at least an hour.

Line a cookie sheet with foil. On a well-floured surface, roll dough to about 1/4" thickness. Thinner cookies will come out hard, so be sure to keep them nice and thick. Cut dough into desired shapes using cookie cutters.

Transfer dough to foil-lined cookie sheet. The colder your dough is, the easier this will be. If need be, use a flat, metal surface (like a pie server) dipped in flour. Cut out centres.

Unwrap a candy cane and place it in a freezer bag. Whack it with your rolling pin until finely crushed (about 5-10 whacks).

Spoon crushed candy into the cookie cutouts. For the square cookies shown here, 1/2 tsp of crushed candy per cookie was ample. Leave lots of room between cookies: I baked 8 per sheet.

Be careful not to put too much candy in, or it will boil over the edges and ruin the look of your cookie. As a general rule, the candy should be level with the cookie, or slightly lower than the dough, while still covering the entire cutout space.


Bake for about 5 minutes, until the edges are firm but before the cookie becomes too hard.

As soon as you take the pan out of the oven, lift the foil off and place it and the cookies on a rack to cool. Allow to cool COMPLETELY, and then gently peel cookies off the foil. If you try to do this step before the centres are cool, they will stick and pull out of the soft cookies. You can reuse the foil for another batch -- my one piece of foil was good for 48 cookies.


How To Make the Frosting and Decorate the Cookies:

Beat the egg white on high for about 15 seconds, and then start adding icing sugar. I put in about half a cup at a time and beat it in, using a spatula to get the sides of the bowl. If the frosting is too stiff once all the sugar is nicely blended in, add the water a little bit at a time. Add food coloring and beat in until the frosting is the colour of your choice. This frosting dries fast, so make sure you decorate as soon as you have it mixed.

Use a spatula or a butter knife to apply the frosting as desired, and sprinkles to make the cookies irresistable. Enjoy!


Original Recipe at: http://my.hearthealthyonline.com/recipe/cookies/buttermilk-sugar-cookies/

Wednesday, June 9, 2010

Jennifer J's Sticky Spicy Chicken

This dish has a nice bite of heat and just a hint of sweetness.

Ingredients:

3 lbs boneless skinless chicken thighs (about 12)

3/4 cup ketchup
1/2 cup salsa
1/4 cup honey
1 Tbsp mustard (Dijon if you have it)
1 tsp chili powder
1/2 tsp cumin

1 Tbsp flour
How to Make:

Preheat oven to 400F.

Combine all ingredients except chicken and flour in a bowl and mix well.

Arrange the chicken in a single layer in a glass baking dish. Pour the sauce over the chicken and turn to coat, making sure each piece gets nice and saucy.

Put in oven and cook for 40 minutes at 400F. When done, place the chicken pieces onto a cutting board and slice up into bite-size pieces.

Strain off any visible fat from the sauce and pour into a pan. Sprinkle the flour over the mixture and whisk in over medium heat until the sauce thickens (about 1 minute). Then add the cubed chicken to the sauce and stir well.

Serve over rice. Easy and delicious!